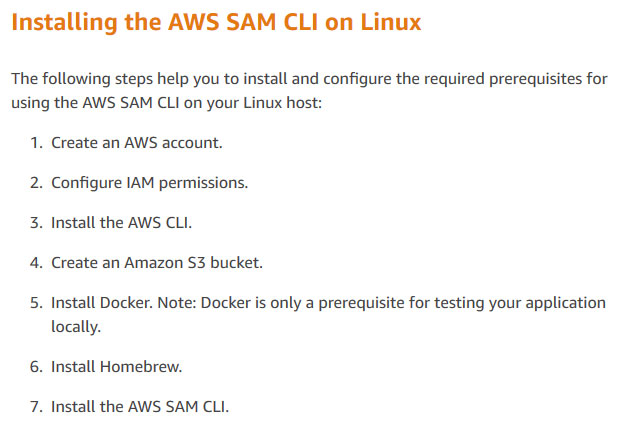
Raspberry Piへ AWS SAM CLIをインストールする方法について説明します。主に下記のLinux版インストール方法を参考にしました。
- AWSアカウント作成 Create an AWS account.
- IAM管理者ユーザの設定 Configure IAM permissions.
- AWS CLIのインストール Install the AWS CLI.
- S3バケットの作成 Create an Amazon S3 bucket
- AWS SAM CLIのインストール Install the AWS SAM CLI
目次
1. AWSアカウント作成 Create an AWS account.
AWSのアカウントが必要です。
下記に新規アカウントの作成方法が記載されています(日本語)。
https://aws.amazon.com/jp/premiumsupport/knowledge-center/create-and-activate-aws-account/
2. IAM管理者ユーザの設定 Configure IAM permissions.
IAM管理者ユーザ(Adminstrator権限)の設定が必要です。
下記に設定方法が記載されています(日本語)。
https://docs.aws.amazon.com/ja_jp/IAM/latest/UserGuide/getting-started_create-admin-group.html
3. AWS CLIのインストール Install the AWS CLI.
Raspberry Pi上で以下のコマンドを入力し、AWS CLIをインストールします。
pi@raspberrypi:~ $ cd
pi@raspberrypi:~ $ mkdir aws
pi@raspberrypi:~ $ cd aws
pi@raspberrypi:~/aws $ curl "https://s3.amazonaws.com/aws-cli/awscli-bundle.zip" -o "awscli-bundle.zip"
pi@raspberrypi:~/aws $ unzip awscli-bundle.zip
pi@raspberrypi:~/aws $ sudo ./awscli-bundle/install -i /usr/local/aws -b /usr/local/bin/aws
pi@raspberrypi:~/aws $ /usr/local/bin/aws --version
aws-cli/1.16.248 Python/2.7.13 Linux/4.19.42-v7+ botocore/1.12.238
AWS IAMでアクセスキーID(Access key ID)とシークレットキー(Secret access key)を以下の手順で取得します。
- 下記のリンクからIAMへアクセスする
https://console.aws.amazon.com/iam/ - 左側のIAMパネルから「ユーザー」を選択する
- 2.で作成したAdministratorを選択する
- タブ「認証情報」(注意:英語の場合はSecurity credentials)を選択する
- [アクセスキーの作成]ボタンをクリックする
- アクセスキーIDとセキュリティキーが生成されるので、csv形式でダウンロードするか、テキストエディタなどへコピーする
※これらのキーは誰にも教えないように
Raspberry Pi上で以下のコマンドを入力し、 アクセスキーIDとシークレットキーをRaspberry Piへ登録します。「region」には、AWSのリージョン(データセンターの所在地)を入力くしてください。米国西部(オレゴン)だとus-west-2です。
(####の部分に取得したアクセスキーIDとシークレットキーを記入)
pi@raspberrypi:~/aws $ aws configure
AWS Access Key ID [None]: ####################
AWS Secret Access Key [None]: ########################################
Default region name [None]: us-west-2
Default output format [None]: json
4. S3バケットの作成 Create an Amazon S3 bucket
AWS SAM用のデータを保持するためにAmazon S3 bucketを作成します。
Raspberry Piで下記を実行してください。「bucketname」の部分は、3文字以上の小文字ですが、他の人が使っている名前は利用できません。 –regionのあとのus-west-2は、AWSのリージョンです。利用するデータセンターに合わせて変更してください。
pi@raspberrypi:~/aws $ aws s3 mb s3://bucketname --region us-west-2
5. AWS SAM CLIのインストール Install the AWS SAM CLI
参考文献の方法では、PC用のバイナリが含まれていたのでRaspberry Piへのインストールが出来ませんでした。そこで、PIPでインストールします。
pi@raspberrypi:~/aws $ sudo pip3 install --user aws-sam-cli
pi@raspberrypi:~/aws $ source ~/.bashrc
pi@raspberrypi:~/aws $ sam init
[+] Initializing project structure…
 Project generated: ./sam-app
 Steps you can take next within the project folder
 [] Invoke Function: sam local invoke HelloWorldFunction --event event.json [] Start API Gateway locally: sam local start-api
 Read sam-app/README.md for further instructions
 [*] Project initialization is now complete
pi@raspberrypi:~/aws $
by ボクにもわかるRaspberry Pi
https://bokunimo.net/raspi/
「Raspberry Pi に AWS SAM CLI Serverless Application Model をインストールする方法」への1件の返信
[…] Raspberry Pi に AWS SAM CLI Serverless Application Model をインストールする方法 […]